Looking for free and easy ways to send large video files?
Chances are you’ve already tried sending large files, but most of the tools dramatically reduced the quality of your original file, required you to download a heavy and complex software (yikes!), or offered very minimal storage capacity.
But here’s the good news: sharing large files doesn’t have to be a compromise on quality or budget. To help you pick the right platform, we closely studied different free and paid video sharing tools, and curated this list of seven ways to share large files.
Let’s walk through each of them.
Jump to a specific section:
- How to Send Large Video Files Through Desktop (3 Best Ways)
- How to Send Large Video Files Through iPhone (2 Best Ways)
- How to Send Large Video Files Through Android (2 Best Ways)
[#TOC1]How to Send Large Video Files Through Desktop (3 Best Ways)[#TOC1]
Here are three ways to send large video files from your desktop device:
1. WeTransfer
WeTransfer is probably one of the most popular file sharing solutions out there. It allows you to send a large video file online — directly from its website’s homepage. You can share video files up to 2GB without any commitments of creating an account. However, if the size of your video file is larger than 2GB, you’ll need to create a WeTransfer account in order to share it.
WeTransfer also offers video collaboration features enabling teams to sync and collaborate easily. It gives visibility into all your file transfers with a chronological record of every file that’s been sent in the past 12 months. This is especially useful for teams, solopreneurs, and even creators who frequently share files with their colleagues and clients.
You can even track when someone downloads your file and get real-time feedback with reviews on your shared file. As an easy and fairly straightforward tool with collaboration features, WeTransfer is as good as video sharing tools come.
How to Send Large Video Files with WeTransfer
Here’s how to send large files using WeTransfer:
1. Go to WeTransfer’s website and click on the + Add your files button. Upload your video from your device. You can also drag and drop the file directly.
2. Tap on the three dots and select how you want to share your video — via email or link.
3. If you want to share your video file via email, then fill out all the requisite details.
- Enter the recipient’s email address, your email address, the title of the video, and a message (optional).
- Click on the Transfer button and you’ll get a prompt to verify your email account.
- Once you enter the one-time password, WeTransfer will start rendering your video and send it to the recipient.
4. To share your video as a link, all you need to do is enter the title of your video and add a message (optional). After WeTransfer processes your video, it will give you a link for your video, which you can share wherever you’d like.
WeTransfer Pros and Cons
2. VEED

If you’re looking for a browser-based video sharing platform that’s highly efficient and feature-rich, VEED is perfect for you. The platform is primarily a powerful yet highly intuitive online editor. But it also doubles down as a video sharing tool for large files as well, that is just as reliable, if not more, as the other tools on this list.
The editor comes with a clean and user-friendly interface, with advanced AI editing capabilities like auto-generated subtitles, automatic trimming, and eye correction. In addition, it also offers other, traditional editing features like pre-designed templates, one-click brand kit customizations, screen recording, voiceover, and even stock library.
VEED is also a video compressor, video hosting platform, and video collaboration tool for teams that need to gather real-time feedback and work on larger projects in an async environment.
New to VEED? The team has built a vast knowledge bank of How-to guides, step-by-step video tutorials, and specific feature pages that walk you through each of the editing tool within VEED. Add on a highly responsive customer service team and you’ve got a tool that’s easy to use yet powerful (minus a steep learning curve).
VEED’s free account gives you access to 20GB storage, two hours of automatic translations, and unlimited projects. You can upload video files of up to 50MB and export them in 720p for free. To upload larger video files and remove the watermark, you can sign up for a paid account.
How to Send Large Video Files with VEED
Here’s how to send large files using VEED:
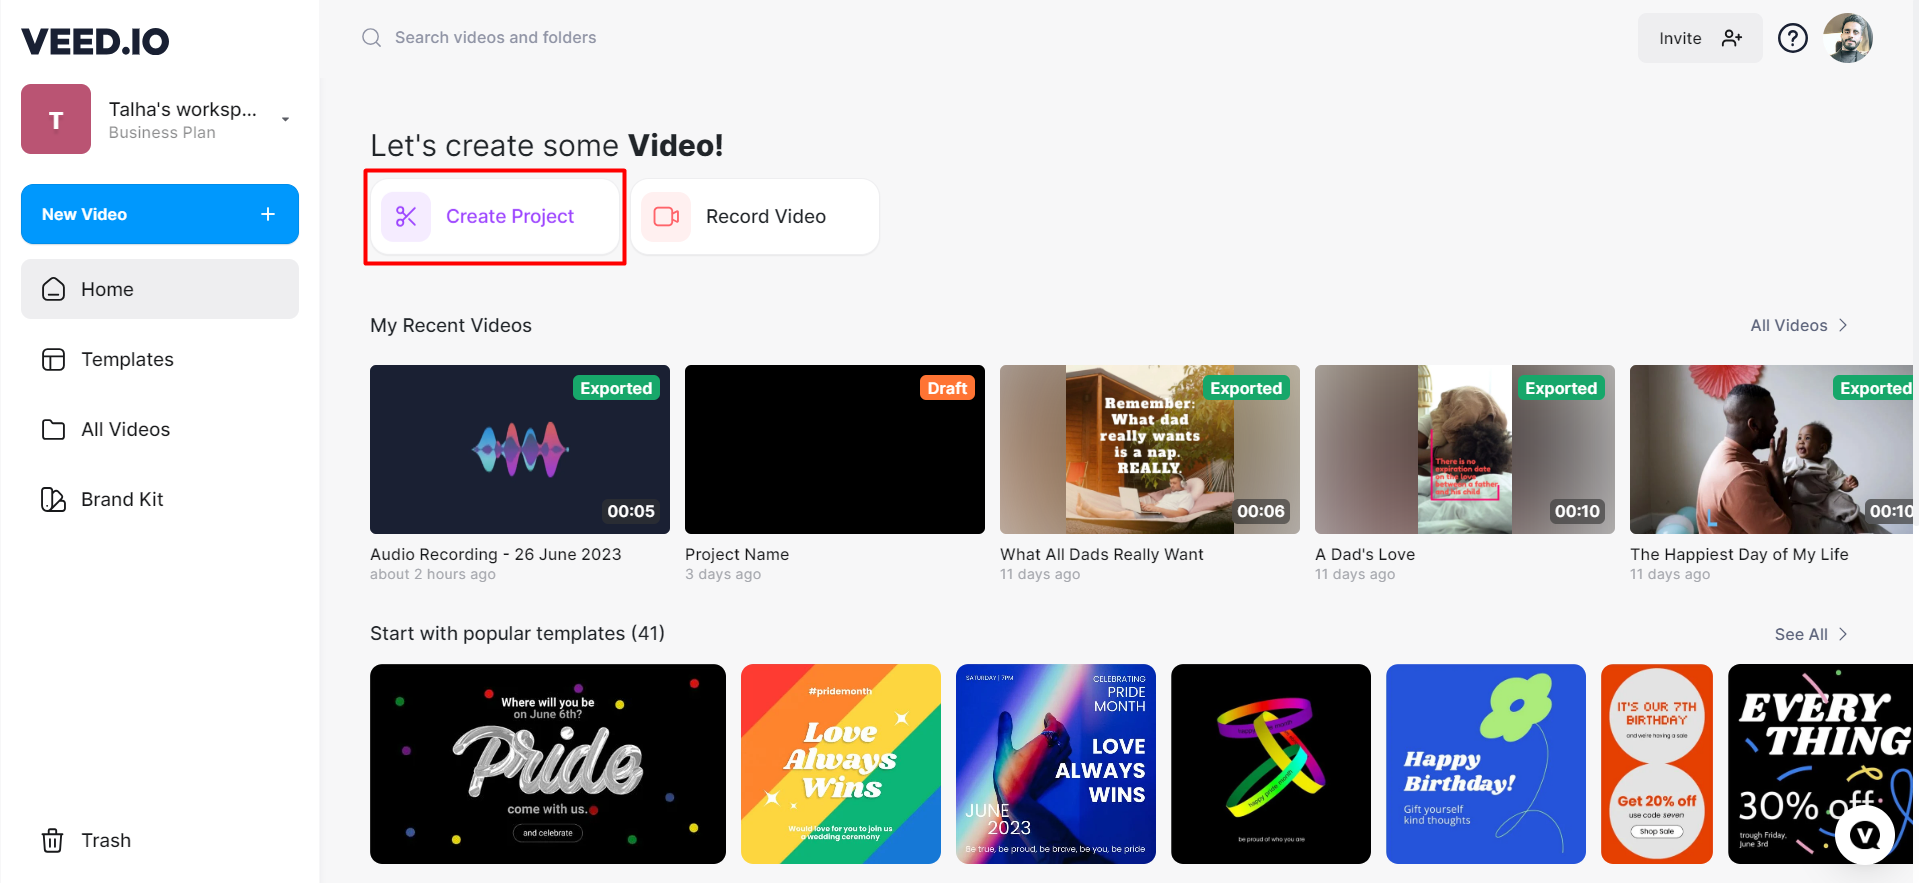
1. Go to VEED. Sign up for an account by clicking on the Sign up button. If you already have a VEED account, hit the Login button to access your dashboard.
2. Upload your video. Click on the Create Project option.

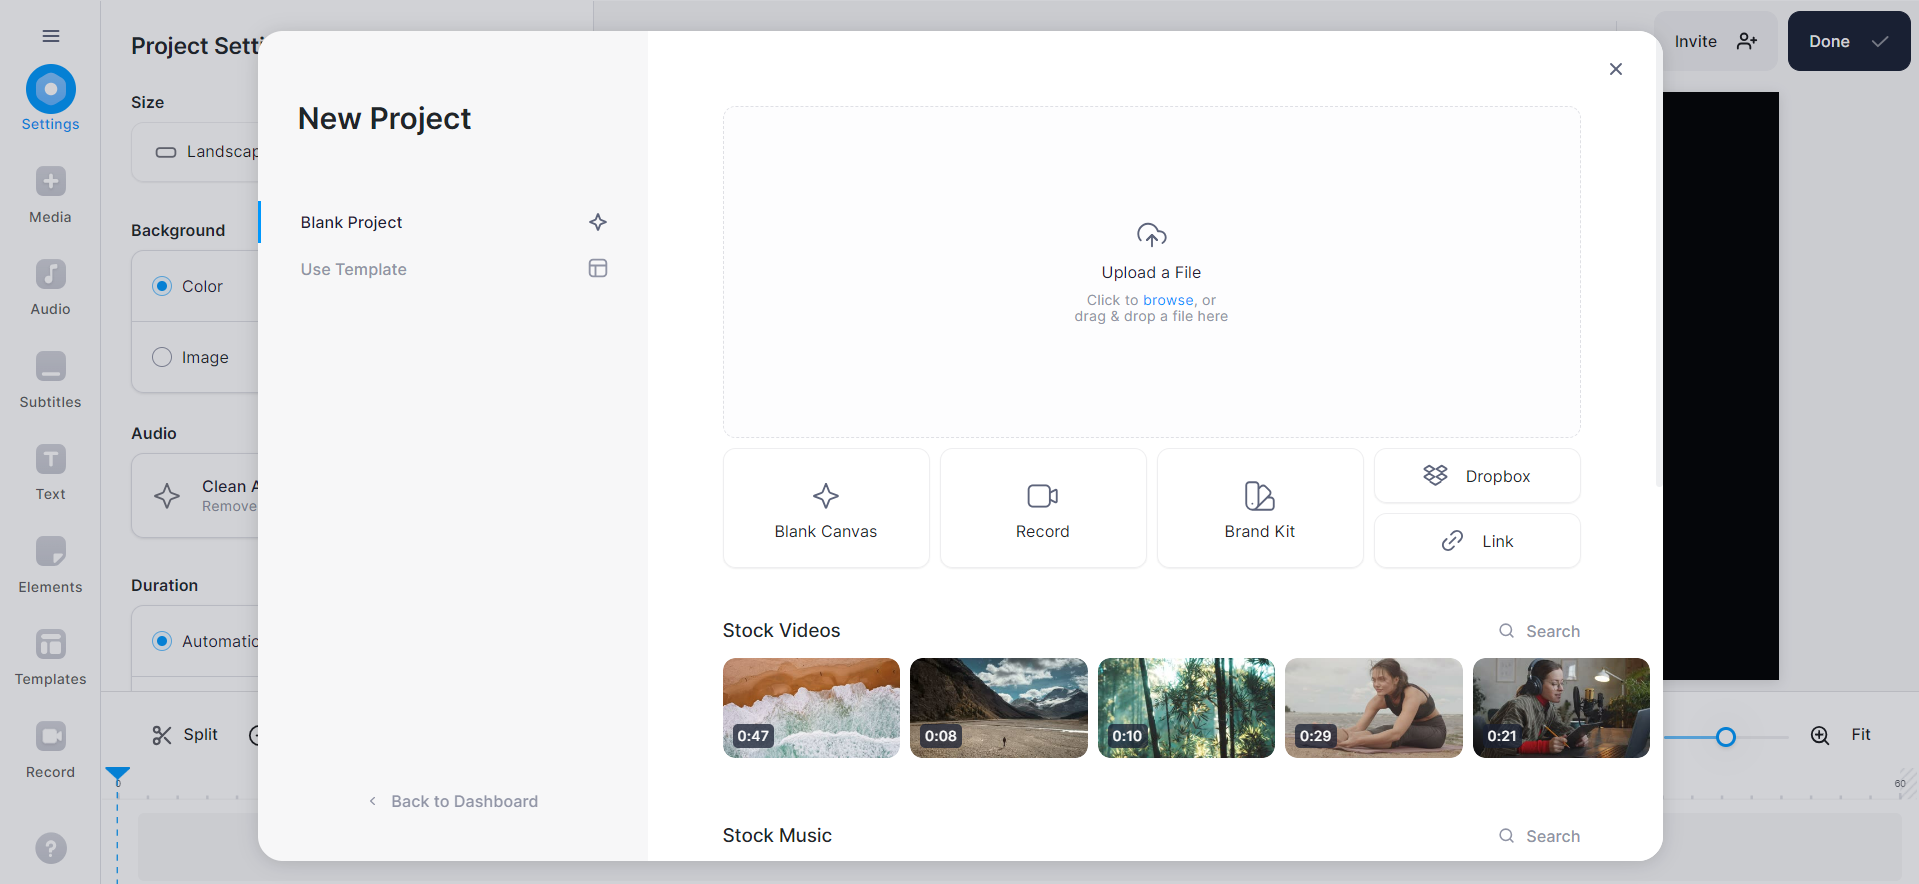
3. Next, select how you want to upload your video file.
- Record a video and send it directly from VEED.
- Upload an existing video file from your computer or drag and drop it.

4. (Optional) Edit your video. If you don’t wish to edit your video, you can skip to step 5.
This is where the magic happens — VEED’s editing features combined with its AI powered tools enable you to transform raw footage into a more compelling narrative. You can set the pace, mood, and emotional impact of a video to ensure it aligns with your content type and personality.
Here are some of the incredible editing features you can use:
- Save Hours of Editing Time with Magic Cut: Automatically remove awkward pauses, long silences, filler words, double takes, and other mistakes to create a high-quality video with Magic Cut. Simply select your video in the timeline and click on the Magic Cut option right above the timeline fold.
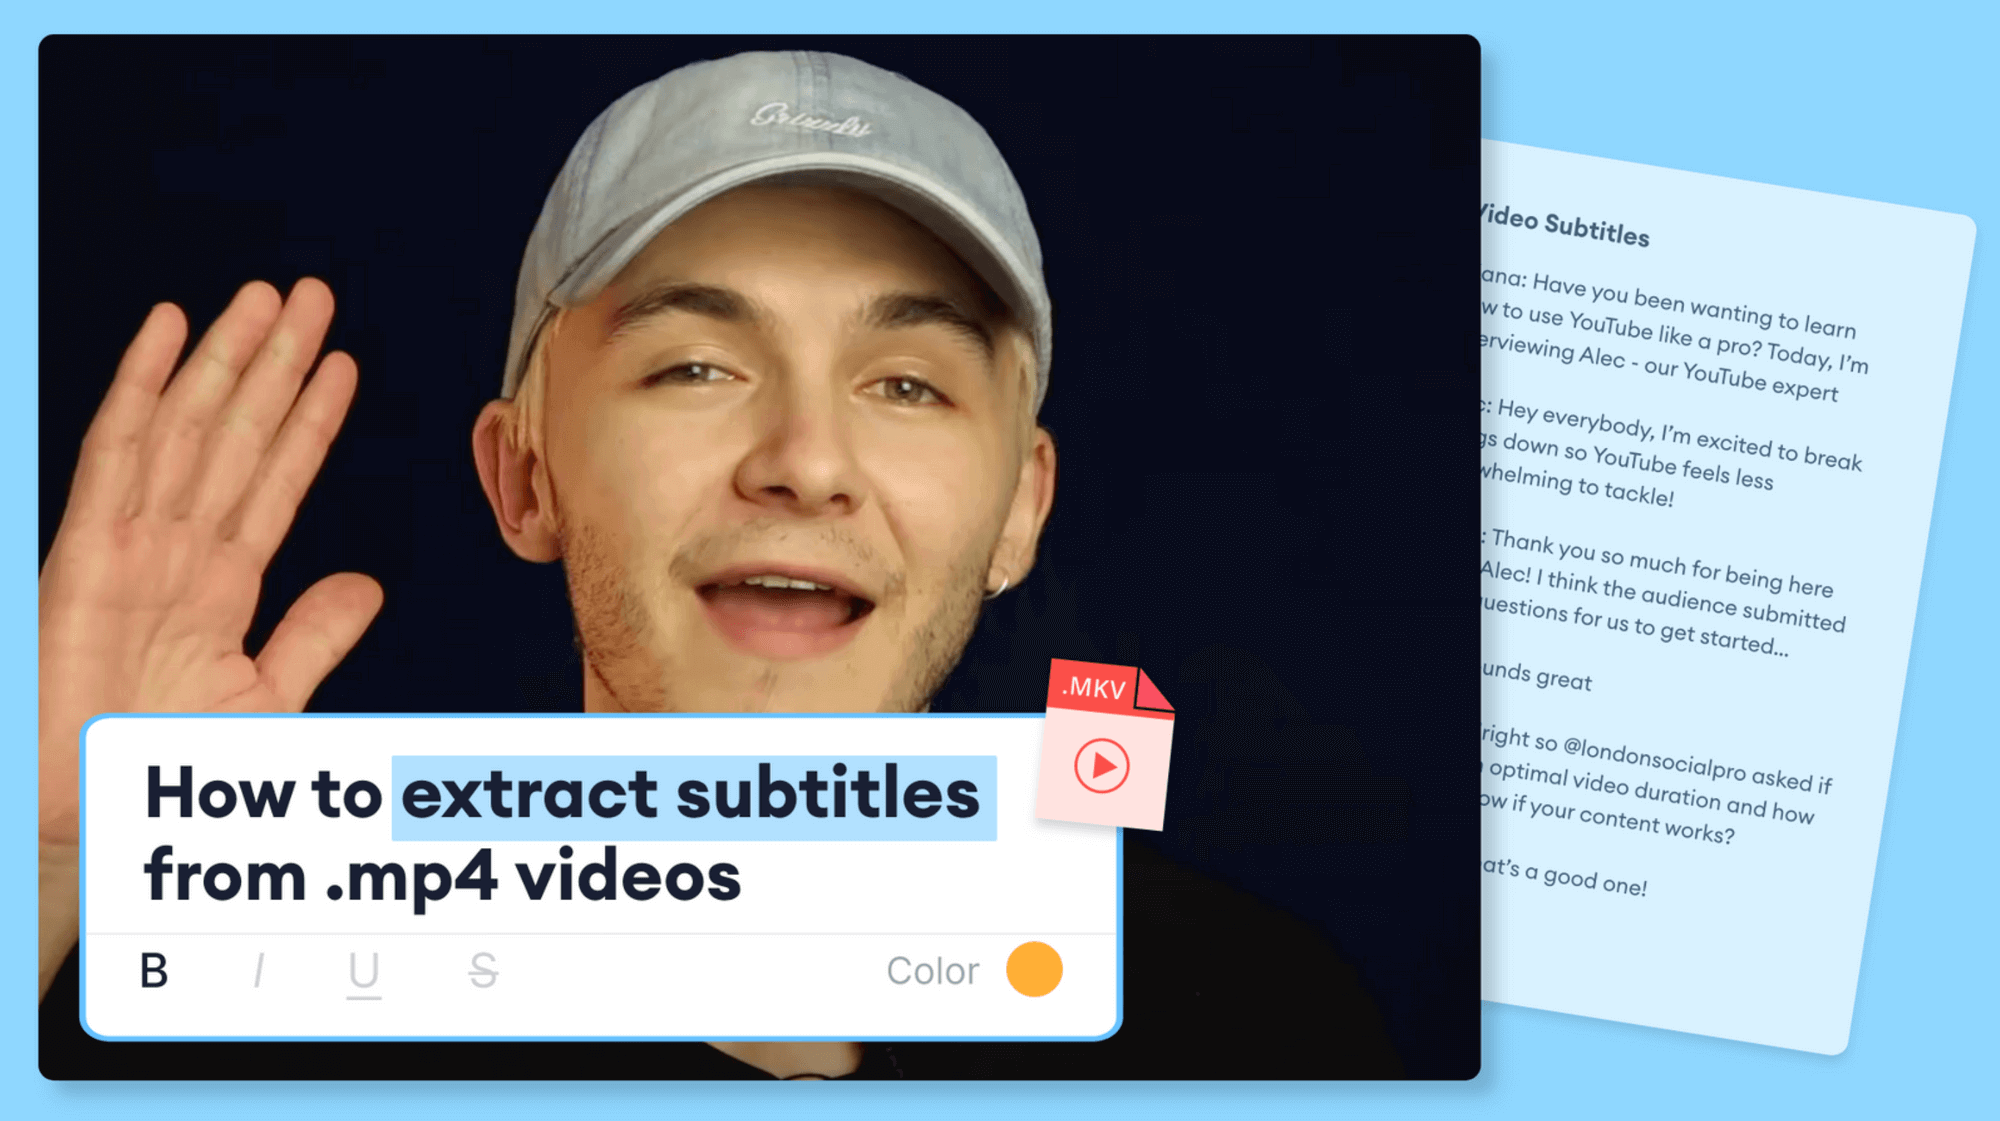
- Generate Subtitles Automatically: Make your video more clear, engaging and accessible to different audiences by adding subtitles. Go to the Subtitles option and click on Auto Subtitle. Next, choose the language you want for your subtitles and hit the Add Subtitles button. VEED’s AI will transcript your entire video and add subtitles to it. Once the subtitles are ready, you can even customize their look and feel — change font type, style, size, appearance, and more.
- Get Access to High-Quality, Copyright Free Stock Media: Add stock audio and video to accentuate the visual appeal of your video. Simply click on Add Media above the timeline fold and select the stock audio and video you want to add in your video.
- Record in Real-time and Add it to Your Video: Maybe you forgot to record an important part of your video. Or maybe you want to record additional clips to add more context to your story. With VEED’s screen recording, you can do it right within the editor. Click on Add Media option above the timeline fold and select the Record option.
And a lot more!
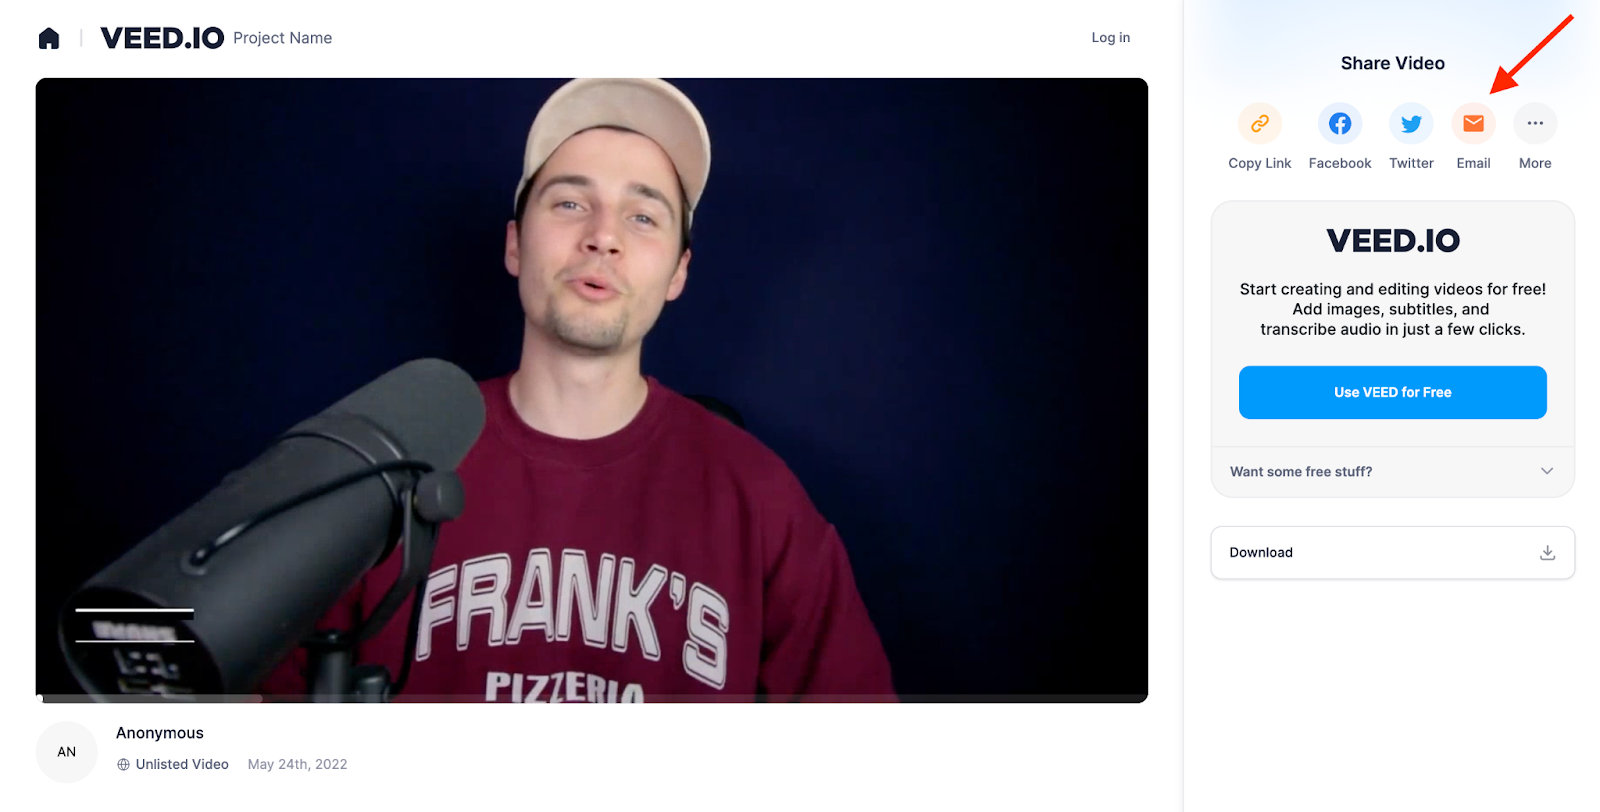
[#Jumptext]5. Now all that's left to do is to export Your video. Once your video is ready, click on Done in the top-right corner, and then click on the Settings icon to select the export video quality. Hit Export Video, which will redirect you to another page where VEED will automatically start rendering your video. Depending on the size of your video file, it can take up to a few minutes to process. After that, you’ll have the following options to share your video:[#Jumptext]
- Share As Link: Get around size limitations by copying the link of your video and sharing it anywhere. You can copy the link directly and paste it into the desired destination like messaging apps, project management apps (some of the more popular ones in the market are Trello and Asana). You can even send it through an SMS.
- Share As Email: Simply enter the email address of the recipient and click on Invite. Or, click on the Email icon and VEED will automatically take you to your email inbox so you can share the video directly with your colleagues.
- Share As a Social Post: To share directly on social media platforms like LinkedIn, Facebook, or Twitter, click on the social app’s icon and VEED will redirect you to your feed where you can share the video.


VEED Pros and Cons
[#TOC2]How to Send Large Video Files from iPhone (2 Best Ways)[#TOC2]
If you’re wondering how to send long videos on iPhone, we got you. Here are two best ways to do that:
3. iCloud
If you’re an iPhone user, iCloud naturally becomes the preferred choice to share large files, given its native compatibility with other Apple devices and convenience. The best part about the Apple ecosystem — MacBook, iPad, iPhone — is that no matter what data you upload on your iCloud, it will be synced across all your Apple devices in real-time.
If you upload a video on your iPhone’s iCloud, it’ll automatically show up in your MacBook. This extended accessibility helps users access files wherever they are. iCloud also provides seamless backups, easy file sharing options, and strong security making it one of the go-to choices for iPhone users.
Overall, it’s user-friendly, doesn’t take time to set-up, and automatically syncs data in the background without sending you annoying prompts or cues. So, if you need to share large files from your iPhone, all you need to do is select the video file you want to send and share it via your preferred channel.
How to Send Large Video Files with iCloud
Here’s how to send large files using iCloud:
1. On your iPhone, go to Settings and tap on your name at the top of the screen. Then, select iCloud and make sure the iCloud Drive toggle is turned on. If it's already enabled, proceed to the next step.
2. Open the photo library on your iPhone and then tap on the share icon at the bottom left corner of the screen. Tap on the Options button at the top of the pop-up and click on iCloud link, and then tap Done.
3. Click on Messages or Mail, enter the recipient’s name or email id, and then tap on the arrow icon to send the message or email.
iCloud Pros and Cons
4. AirDrop
If you want to share large files with another iPhone user (or even Apple user), AirDropping is a no-brainer. It’s a seamless way to share files with Apple users who are in close proximity.
To use this option, make sure the recipient is nearby and within Bluetooth and Wi-Fi range. They need to have their Wi-Fi and Bluetooth turned on in order to receive the video file. Additionally, ensure both of you have your Personal Hotspot turned off. The recipient also needs to turn receiving on for AirDrop to successfully receive data from your iPhone.
If you’re in their contacts, they need to have your Apple ID’s email address or mobile phone number saved in the contact card. Else, they need to set their AirDrop receiving setting to Everyone to receive the file.
How to Send Large Video Files with AirDrop
Here’s how to send large files using AirDrop:
1. Go to Settings on your iPhone. Then, navigate to General > AirDrop, and then tap on Everyone for 10 minutes. Or slide down the widgets menu and tap on AirDrop and select Everyone for 10 minutes.
2. Open your photo library and select the video you want to share. Then, tap on the share icon.
3. (Optional) To send videos in original quality along with its editing history and metadata including location and captions, click on Options in the pop-up window and turn on the All Photos Data toggle button.
4. Tap on AirDrop, then select the contact or device you want to share your video with. Once you select the recipient, they will get an alert to accept or decline the AirDrop transfer.
AirDrop Pros and Cons
[#TOC3]How to Send Large Video Files from Android (2 Best Ways)[#TOC3]
Team Android? No problem! Here are two best ways to send large video files from your Android device
5. Google Photos
Google Photos lets you share files via Gmail, social media apps like Instagram, LinkedIn, and Twitter, and even URLs. No need to download or use another video sharing application — simply select the video file you want to share, click on the share icon, and select the preferred channel.
It provides automatic backup so you can access your latest videos in real-time and share them quickly. The best thing about Google Photos is that it organizes your content in a meaningful way, allowing for faster and easier file access.
It automatically creates albums and even allows you to search specific files based on facial recognition, location, file type (photos, videos, documents), and even things (think of landscapes, skyscrapers, food, canyons, etc.).
How to Send Large Video Files with Google Photos
Here’s how to send large files using Google Photos:
1. On your Android device, open the Google Photos app.
2. If you haven’t signed in already, sign in to your google account to access all your synced photos and videos in the Google Photos app.
3. Once you’re signed in, browse the app and find the video you want to share.
4. Tap on the + icon and select people you want to share your video with. You can enter their name, business phone number or email address. If you want to share a video with multiple people, select the needed option. Then, tap Send to share your video file.
Google Photos Pros and Cons
6. Google Drive
Google Drive is another cloud storage service that helps users store, manage, and share your files. It’s a simple way to share large video files, collaborate with others, and manage user access control for different files. Being a cloud platform, Google Drive lets you access files from wherever you are with any device with an internet connection. Additionally, you can share files across a wide range of platforms, including messaging apps such as WhatsApp.
It offers 15GB of free storage space, after which you need to become a paid member to use it. Since Google Drive’s pricing is pretty flexible, it’s one of the most affordable video sharing solutions available in the market. You can get the 100GB plan for only $1.99 per month.
How to Send Large Video Files with Google Drive
Here’s how to send large files using Google Drive:
1. On your Android device, open the Google Drive app. Log in to your google account to access all the files in your Drive, if you haven’t already.
2. To upload a video file, click on the + icon at the bottom right of the screen. Then, tap on Upload. If you already have a video file saved on your Google Drive, browse your drive and select it.
3. Once the video file is uploaded, tap the three dots icon and a window will appear with multiple actions. Now, click on the +Share option to send your large video file to specific people or groups. Or, you can tap on Copy Link and share the unique link wherever you’d like.
Google Drive Pros and Cons
What’s the Best Way to Send Large Video Files?
The best way to send large files primarily depends on your preference and the device you’re on. If you’re someone who frequently shares video files, we’d recommend you consider asking these questions so you can pick the right platform that suits your needs best, and use it regularly.
- Would you like to make simple edits to your videos to increase engagement? Think subtitles, templates, one-click brand customizations.
- Do you want your team members to share their feedback in real-time? Consider a platform’s ability to allow comments from recipients.
- Do you want to upload it as a standalone video and share the link for a larger audience to watch? Maybe you don’t want the hassle of a YouTube channel, but sometimes need to host videos for multiple people.
Based on your needs, you can select the right platform. It’s worth pointing out that VEED supports all of the above mentioned features — AI powered editing tools, collaboration, and video hosting platform. So, if you’re looking for a dependable, easy to use yet powerful video platform that takes care of everything, from video recording to editing, and sharing, VEED is the perfect choice.
Best part is you don’t need to be a pro at video editing to use VEED. It’s designed for busy professionals including YouTubers, online educators, creators, social media managers, influencers, and podcast producers who can’t afford to spend months learning the ins and outs of a tool, but aim to produce studio-production quality videos.
Ready to get started? Sign up for VEED right now and edit your first video.


