Want to learn how to automatically add subtitles to MP4 in a super quick and easy way? Here’s the perfect tutorial for you.
At VEED, an easy-to-use, yet powerful, video editor our thriving community of video content creators have attested to the quiet effectiveness of adding subtitles and caption files to their MP4 videos.
Many of them add captions or subtitles to make their video content accessible for those who are hard of hearing or simply prefer for those who watch videos on mute. Others use VEED to automatically add and translate their MP4 videos to give viewers to watch the content in other languages.
In a nutshell:
- Upload the video to VEED
- Automatically add subtitles to MP4
- Automatically translate subtitles
Minus the processing time, these things will take around 1 minute. Not a believer? We’ll show you how.
How To Automatically Add Subtitles To MP4 Videos In Under 60 Seconds
1) Go to VEED and upload the video you automatically want to add subtitles to
Note: If you want to save your projects and start new ones, just sign up for free at VEED (you only literally only need to enter your email).
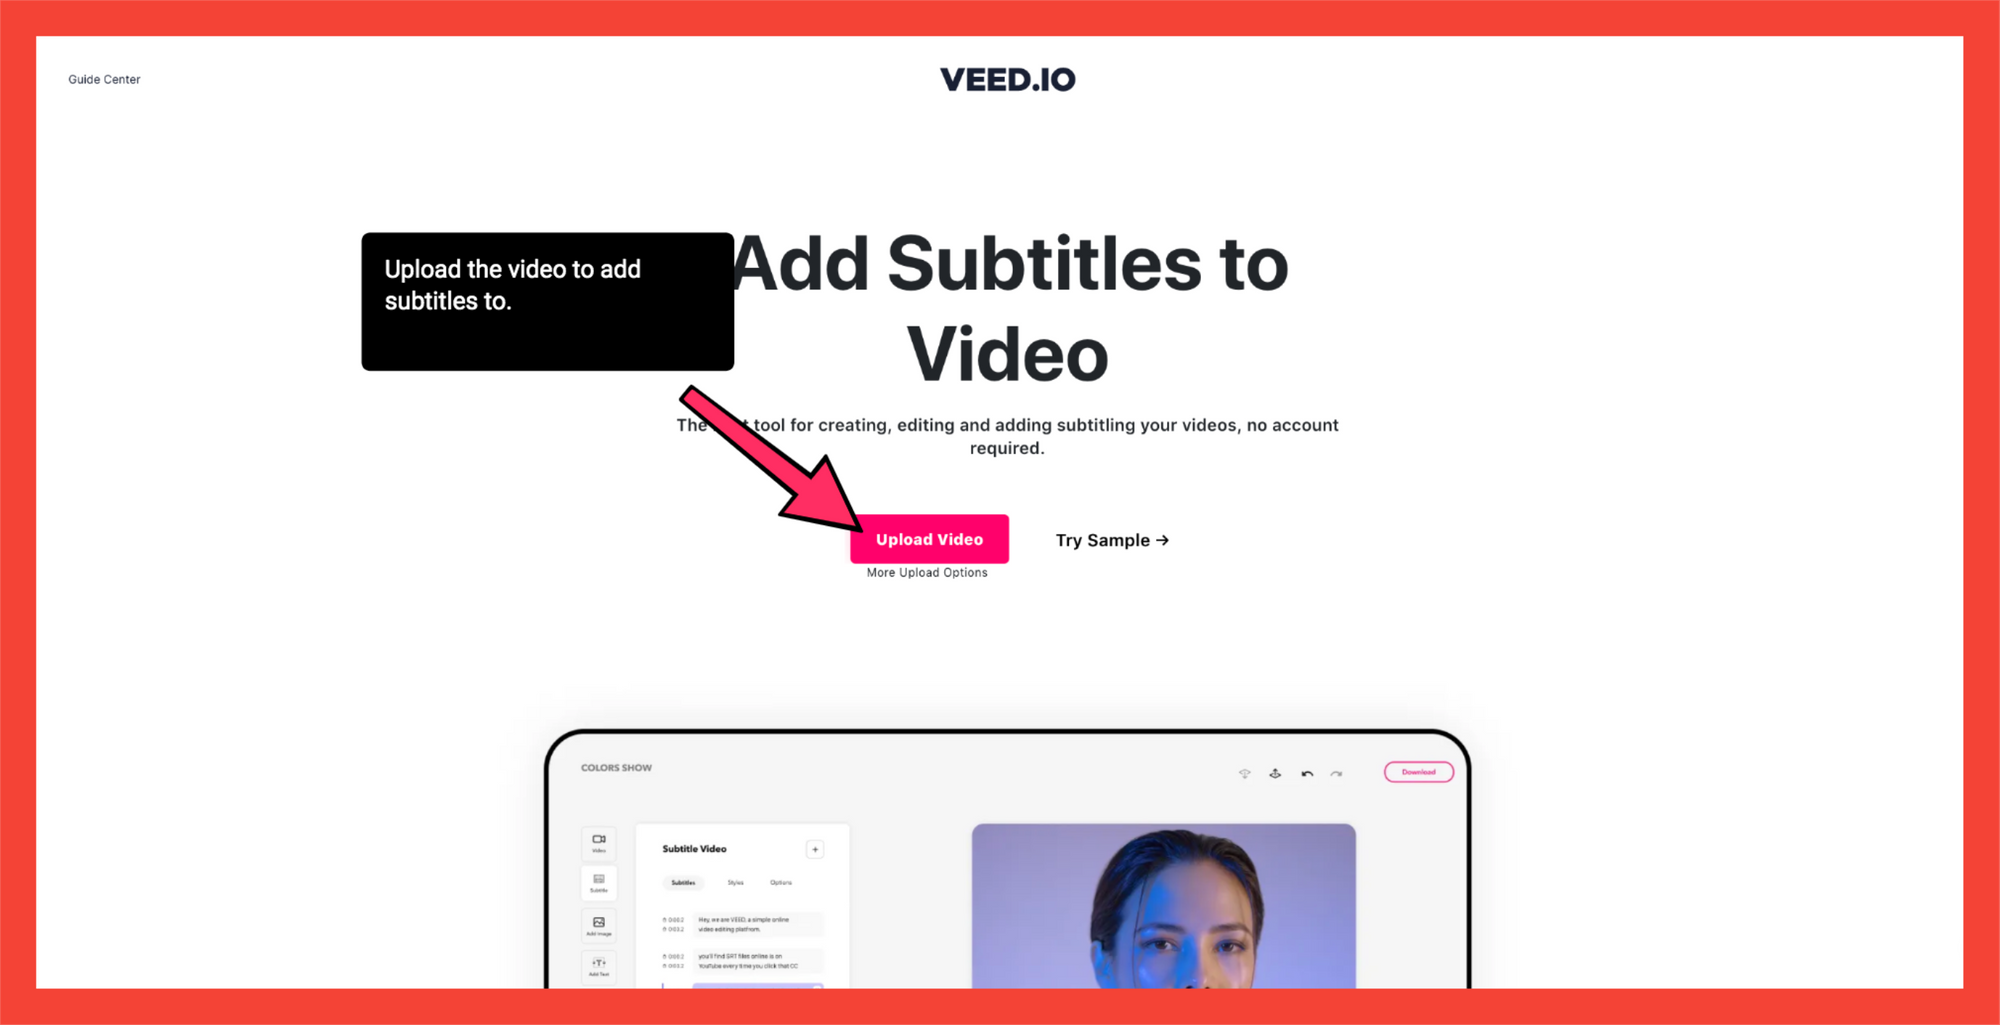
You can upload your MP4 file from:
- Your personal folder
- Dropbox
- Camera
- YouTube link
2) In the left toolbar, click on Subtitle
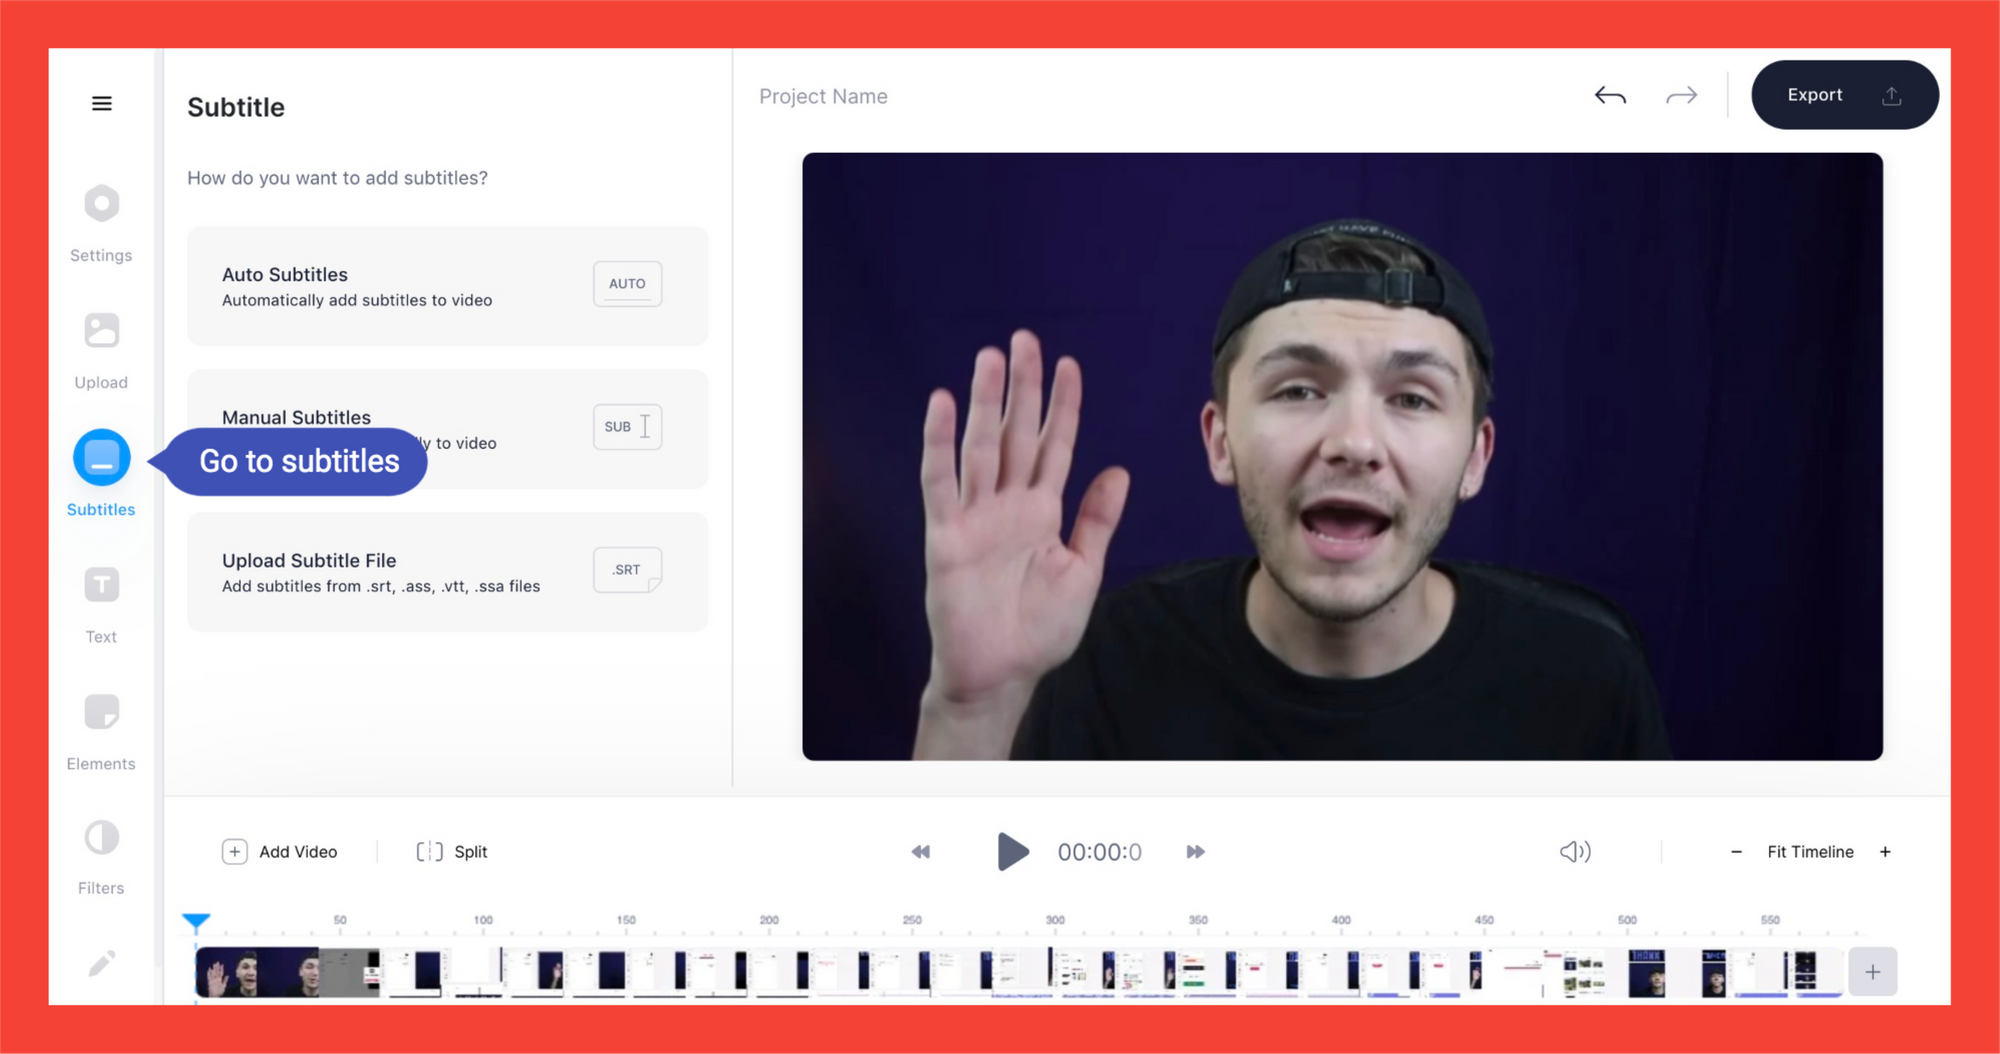
3. Click on Auto Subtitles
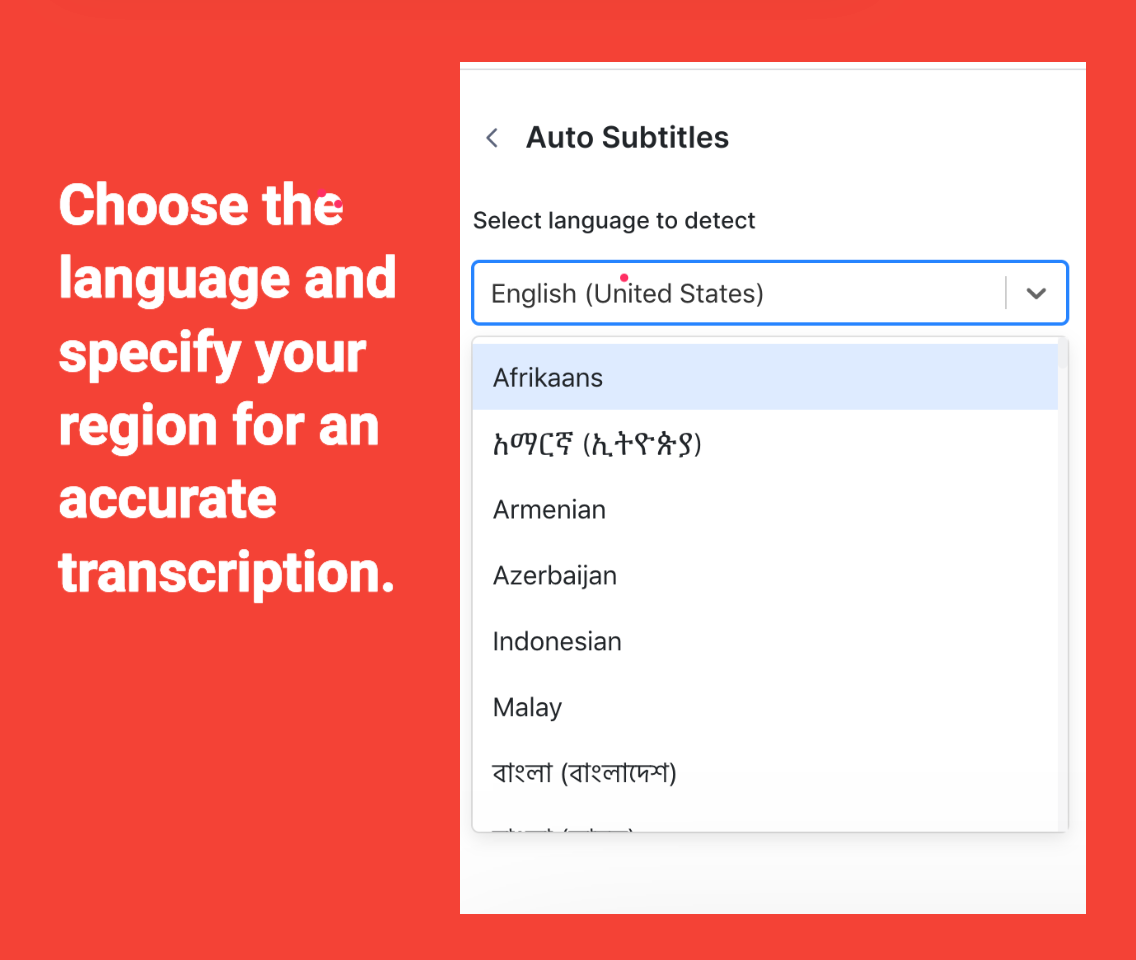
4. Choose your language
You need to remember to choose not only the language but also specify the regional option.
VEED’s AI transcription is pretty powerful, but it won’t be able to properly automatically transcribe an English accent if you choose English subtitles from USA. Different accents mean different ways of pronouncing the same words.
5. Click Start
Now, wait for it to render and automatically add subtitles to your MP4 file. It should be done in no time. As VEED says, please be patient 🤖.
In the media player, should now see captions playing. You can go to the subtitles editor to change your subtitles:
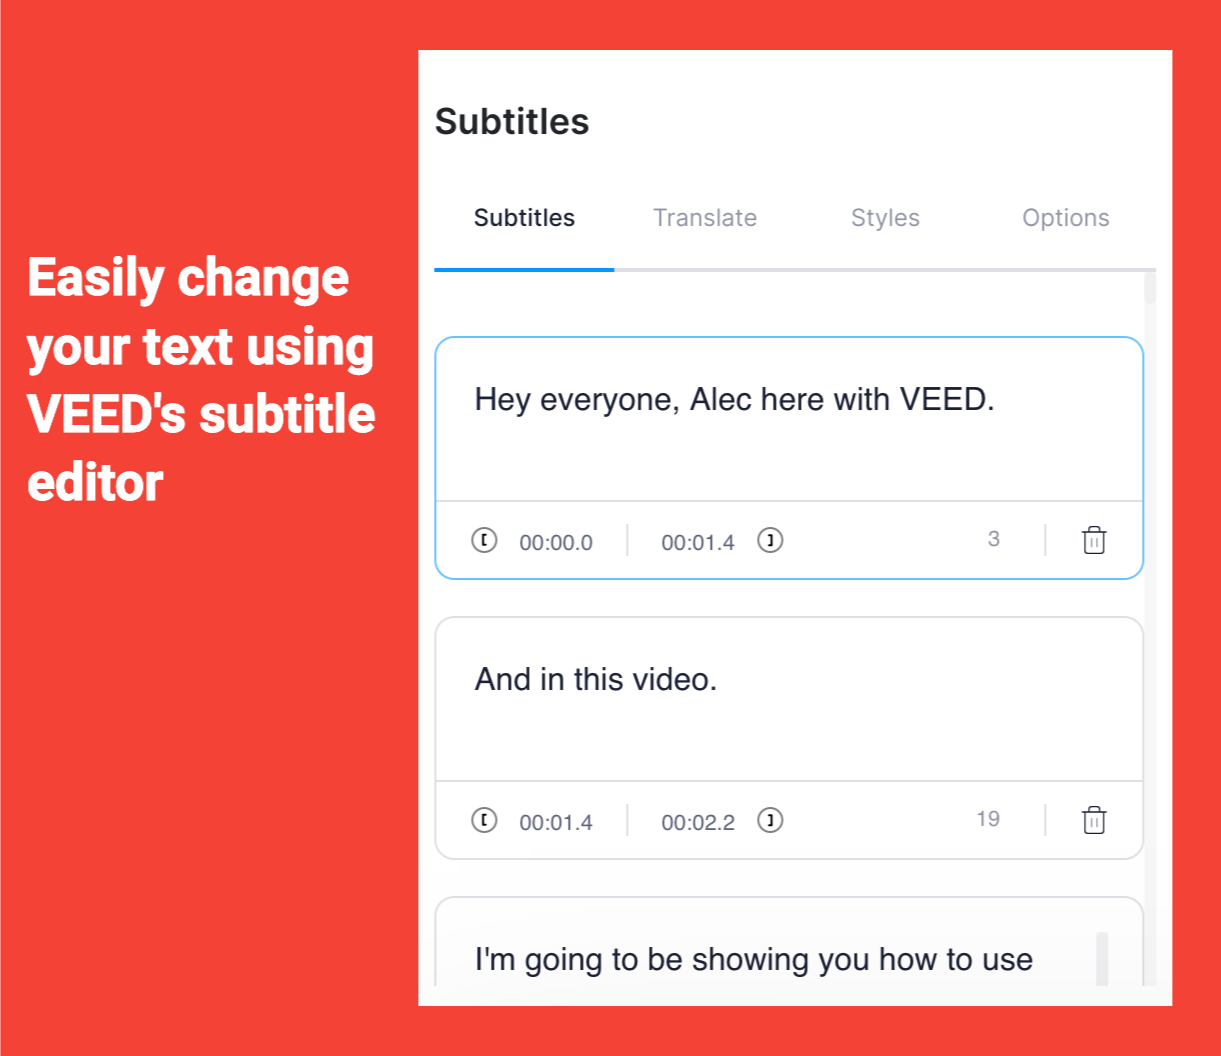
6a. Go to Options to download the subtitles as either SRT, VTT, or TXT files format
6b. With the subtitles added into the video, hit Export
Otherwise, you can download videos with the subtitles hardcoded into it. There you have it. You've just added captions or subtitles to video.
How To Automatically Translate The Subtitles You’ve Added To Your MP4 Videos
Now that you’ve learned how to automatically add subtitles to MP4 video file in a super quick and easy way, here’s how you can also automatically translate them in a few steps.
1) Go to Subtitles in the left toolbar
2) Go to the Translate tab
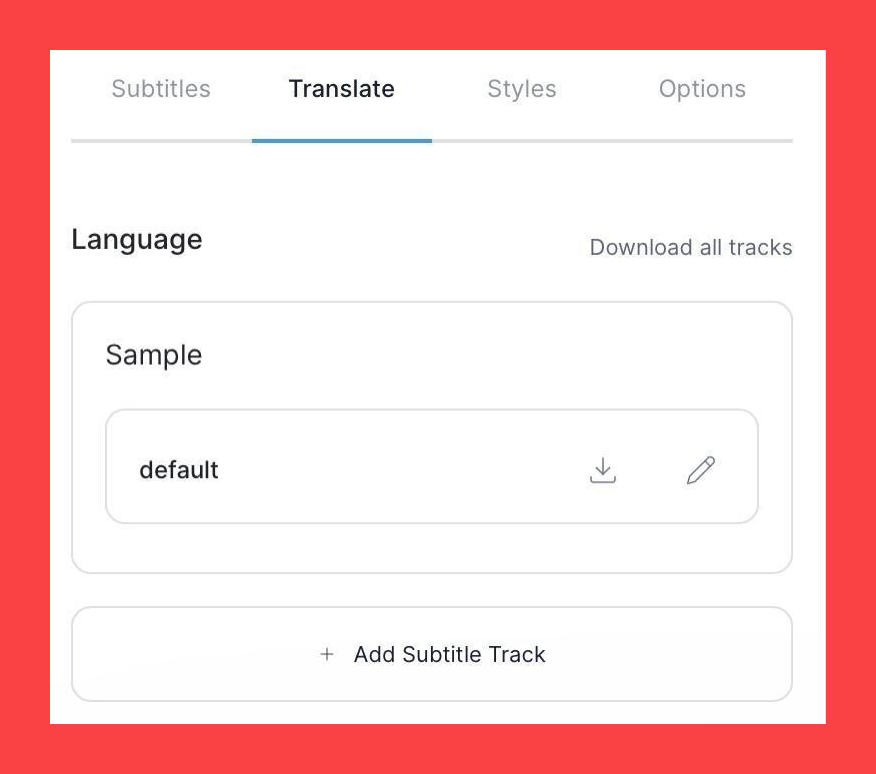
3) Click on Add Subtitle Track
4) Enter the language you want to translate the original MP4 content to.
So there are two drop-down fields.
In the left field, choose the language you want to translate the subtitles into.
In the right field, you can either choose to:
- Translate from the original language. For this tutorial, choose this option.
- Translate from a subtitle file.
5. Hit Create
6. Click on Edit to activate that translated subtitle track for your MP4 video
In the video player, you should see which subtitle language is playing.
7a. Download one of the translated subtitle tracks as an .srt file by clicking on their file name, next to the small download tray icon
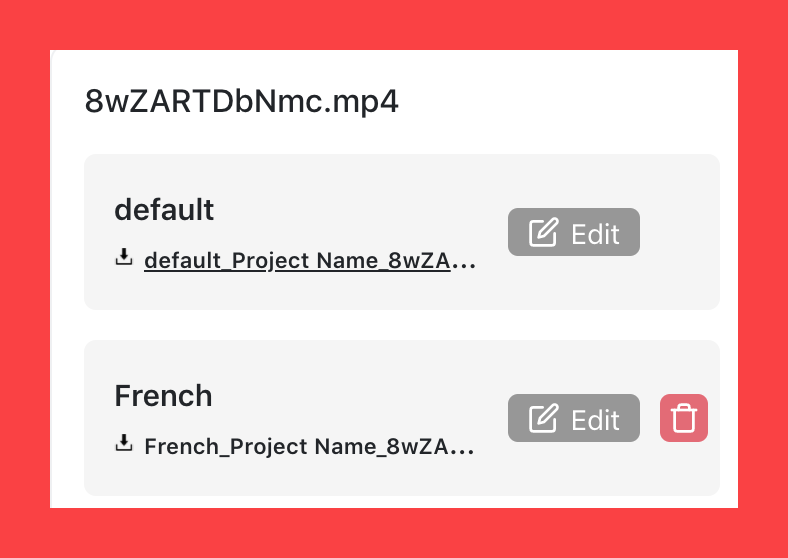
7b. Go to Options to download all the subtitle tracks as either a zipped TXT, VTT file or SRT file.
7c. Hit Export to download the video with the chosen (translated) subtitle tracks added into the MP4 video.
There you have it… 3 different options to get your translated subtitles!
Some Tips On Using The Subtitle Tracks Added To Your MP4 Videos
1) Use the subtitle editor to refine some bits
VEED’s automatic transcription is accurate most of the time, but there are some instances, in which it hilariously blunders.
For example, you’re probably going to have to proofread most proper nouns and names. If you don't put the right language, the subtitles will probably end up being all wrong, too. After all, French doesn’t really sound similar to English or let alone Chinese.
But in those rare instances in which it didn’t get a sentence right, you just need to go to the subtitle editor and change the words so that they’re correct. Easy.
2) Under Styles, you can change the way your subtitles look

Under Styles, you can change the typeface, the font color, font size, letter spacing and line-height of the chose subtitle track to make the captions appear more visible in the video or to better fit your visual branding guidelines.
You can also play a bit with the capitalization… although, I suggest keeping the sentence format because the title case might disrupt the viewing experience if people have to stop and read every capitalized letter.
3) Upload your subtitle files separately on YouTube, Facebook and LinkedIn to boost reach and engagement
This is a tutorial about adding subtitles to your MP4 video, but if you’re going to upload them to YouTube or LinkedIn, upload the subtitles as separate files (either .SRT or .VTT) that you can download from VEED’s video editor.
Why? Well, according to recent research, YouTube analyzes your MP4 video content through its added subtitles and helps the content rank faster. When your MP4 video appears on the first page of the search results, you’ll get sweet organic traffic (ie more viewers).
If the same principle applies on LinkedIn and Facebook, then you better do the same thing and upload your subtitles as a separate captions file.
It’s such a simple hack that can really benefit you in the long run, if you want to build a community.
4) Add subtitles to your MP4 videos to make your content accessible
Adding subtitles to your MP4 video does not only benefit your viewers who are hard of hearing.
Think about it. When you add subtitles to your MP4 video, this means that people can also watch your videos with the sound off!
According to a recent study, “69% view video with the sound off in public places and 25% watch with sound off on private places.” That’s a lot of people you could be potentially neglecting by not adding subtitles to your MP4 videos! So yeah video with subtitles are definitely more engaging!
5) Translate your subtitles to reach a more international audience
Again, this is all about giving options to your different types of viewers. If you have many viewers speaking the same foreign language, whether Spanish, French, and so on, then translating your subtitles for them can be a good gesture of appreciation for their support and for watching your videos.
And, of course, translating your subtitles also has the added benefit of attracting more viewers globally.
And, for SEO, Google will be able to analyze the different subtitle tracks if they've been uploaded as a separate captions file to YouTube. This can help you rank in foreign language keywords!
So upload that captions file to the social media platform separately! No permanent hard coded captions!
6. Turn your txt file into an article
Use the transcript from the txt file and turn it into an article. Downloading closed caption files is one thing, but you can also include the transcript for interviews to help your users and audience engage with your content in different ways.
Added Subtitles To Your MP4 Video? Great! But VEED Has Many Other Powerful Features Too
In this quick tutorial, you’ve learned how to automatically add subtitles to your MP4 video and then automatically translate the subtitles, too!
With VEED, you can download the captions file as an SRT file format or other subtitle files as closed captions, include them directly into the video file, and automatically include other subtitle languages.
But of course, VEED is video editing tool that is so much more powerful than for adding subtitles to your MP4 videos. Add text to video, add audio files, change video speed, and so on for a variety of videos. You can even use Magic Cut to remove pauses and filler words in just one click.
If you want more guides like this, read our blog and follow us on YouTube and Instagram! Later.


