.png)
Traditionally, creating subtitles and translating them takes a lot of time and money. However, VEED makes it all fast and cost-effective.
85% of people are more likely to watch your video if it includes subtitles. Safe to say, by adding subtitles to your business videos—be it training content, internal comms, or sales pitches—you’re more likely to not just get a better response but also increase global reach if you use translations.
Read on, as we go over how you can use VEED to not just add subtitles to your business presentations, but also translate them effortlessly.

Step 1: Import Your Video into the VEED Editor
Head over to VEED.IO and log in to your workspace (or sign up for a new account). Once in there, head over to Create Project. On the next screen, click on Upload Files to import the video from your device onto VEED.
Step 2: Generate the Subtitles for Your Video
After your video is loaded into the editor, click on Subtitles in the sidebar. Click on Subtitles and then Create Subtitles, and wait for VEED to automatically generate them. Depending on how long your video is, it can take anywhere from a few seconds to a few minutes.
Once the subtitles are ready, you can conveniently modify any mistakes, such as special names. VEED makes this easier by highlighting such words in orange, so you can easily identify anything that might need adjusting.
Step 3: Modify the Style, Placement, and Speed of Your Subtitles
Once the subtitles are all set, you can also conveniently modify their look and feel by selecting from a preset. You can also adjust their speed, placement, and even apply animations to them with just a few clicks until everything aligns with your brand.
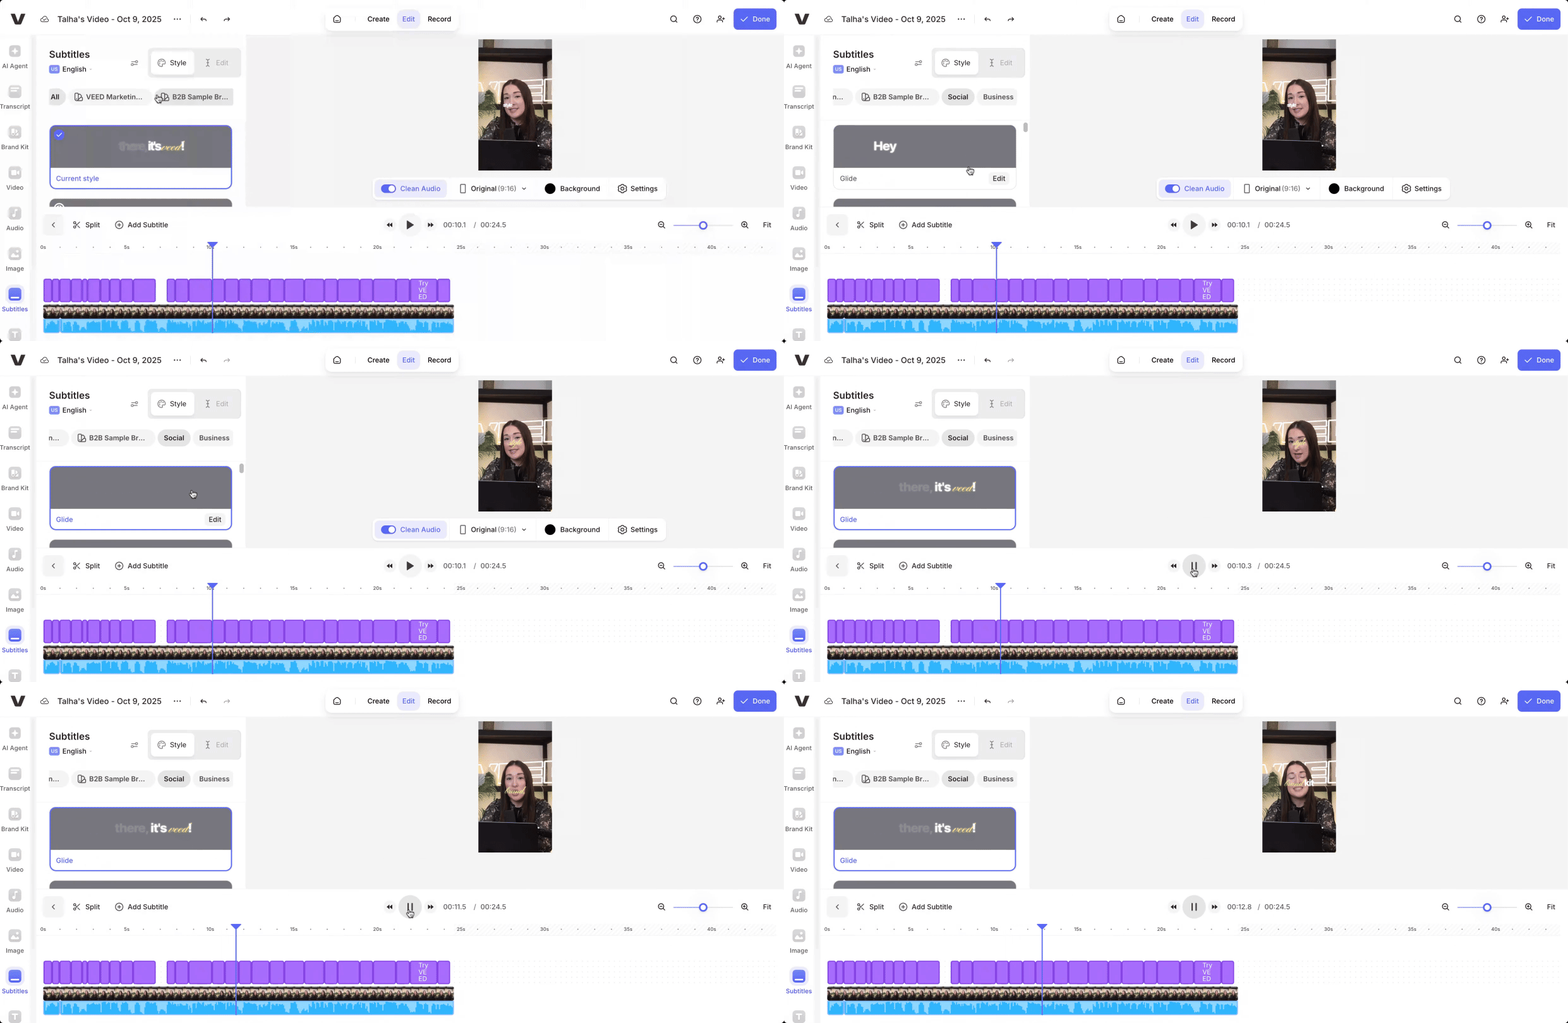
Now, you can also add Dynamic Subtitles that move and change styles on-screen with the flow of the video. With your subtitles generated, select Social from the styles, and pick a preset that you like.
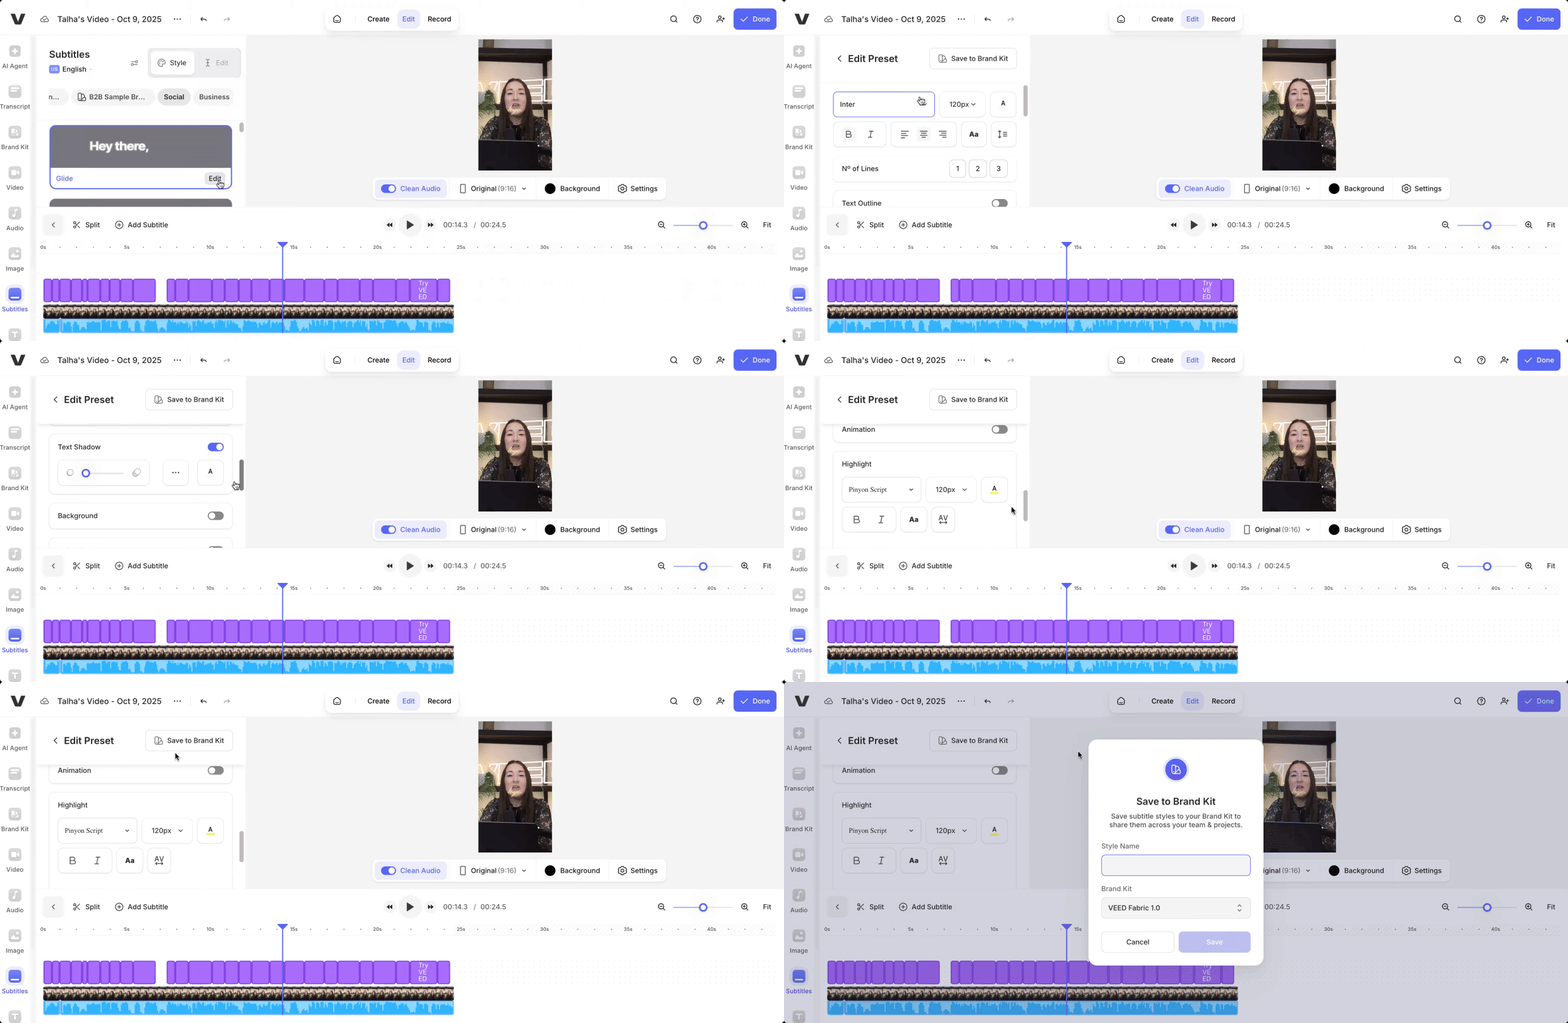
You can also Edit a preset, and add your own brand fonts. Once done, click on Save to Brand Kit, and the style will appear for everyone on your workspace.
Step 4: Translate Your Subtitles (Optional)
VEED also lets you translate your subtitles into over 100 languages.
With the generated subtitles open, move your cursor to the sidebar and click on Translate. Select the language that you want to translate your subtitles into, and then click on Translate automatically. Within seconds, your translated subtitles will be ready.
Translating your content can not only help your business reach a larger, global audience but in some cases, it’s legally required. For instance, in Canada, it’s legally required for businesses to translate their training videos into French under Bill 96 or else you can be fined between $700 and $90,000.
Learn How Whirlpool Canada Uses VEED to Translate Their Training Videos into French and Comply with Bill 96
Step 5: Export
Now that your video has subtitles, you can go ahead and easily export them using VEED. Click on Done in the top-right corner of the editor, set the required quality level, and hit Export Video.
Wait for VEED to finish rendering your video, after which, you can share it with the people across your company (or your partners and clients).
And there you have it. With just a few clicks, you can not only add subtitles to your business videos but also instantly translate them. No more trying to do itmanually or having to hire a translating service to help you communicate and reach a global audience.
Liked this VEED 101 guide for businesses? Check out our guide on how to make professional business presentations with VEED’s online screen recorder.